Copy and Paste the following terms and search our class blog for the definitions.
This will serve as a study guide for your Hands-On Demonstration Tuesday.
What is snapshot? A Photograph? What is the difference between them?
What is the setting on the Mode Dial that we use?
Make sure you can change from Auto to manual Focus.
What is Aperture?
Make sure you can change the Aperture on the camera
What is Shallow and Deep Depth of Field?
What is a good setting for Shallow Depth of Field?
What is a good setting for Deep Depth of Field.
What is Shutter Speed?
What is Motion Blur? Freezing Action?
Make sure you can change the Shutter speed on your camera
What is the Shutter speed that is about the middle between fast and slow shutter speed?
What is the Rule of Thirds?
Make sure you can compose a photo using the Rule of Thirds.
What are the various Perspectives we used?
What are the Principals of Design that we used?
Make sure you can compose a Photo using the Perspectives and Principals of Design.
What is a Histogram in Photoshop?
Make sure you can interpret a Histogram for different Photographs
How do we change a Photo from color to black and white in Photoshop?
What tool in Photoshop do we use to lighten or darken specific areas of a photo?
Thursday, December 12, 2019

Tuesday, December 10, 2019
Final Portfolio
You can start this today and complete it in the next few classes.
Please take a look at the blog and upload any work that you might have missed.
Make sure that all of the pictures have been DESATURATED - Converted to Black and White.
If you are sure that all of your assignments are up to date then begin work on your Final Portfolio.
Here are some good examples of past Final Portfolios:
http://elizabethpphoto13afall16.blogspot.com/
http://connorlphoto13afall16.blogspot.com/2016/12/final-portfolio.html
In the first section you will post your 15 strongest images from the semester and provide a brief critique of each including 1 very strong element and 1 element you could improve upon. NOTE- Pick something from the Critique Guide.
In the second part you will provide an assessment of your portfolio and your work ethic.
Overall Portfolio-Semester work
Please answer the following questions about your overall work this semester using the 1-4 scale:
1=Not at all, 2=Somewhat, 3=Mostly, 4=Absolutely
I completed my assignments on time 1 2 3 4
I fulfilled all assignments 1 2 3 4
Made good use of class time 1 2 3 4
Used a creative approach 1 2 3 4
My pictures unique and original 1 2 3 4
My craftsmanship is excellent 1 2 3 4
My images are sharp and focused 1 2 3 4
My images are well composed 1 2 3 4
My images have good contrast and exposure 1 2 3 4
Please take a look at the blog and upload any work that you might have missed.
Make sure that all of the pictures have been DESATURATED - Converted to Black and White.
If you are sure that all of your assignments are up to date then begin work on your Final Portfolio.
Here are some good examples of past Final Portfolios:
http://elizabethpphoto13afall16.blogspot.com/
http://connorlphoto13afall16.blogspot.com/2016/12/final-portfolio.html
In the first section you will post your 15 strongest images from the semester and provide a brief critique of each including 1 very strong element and 1 element you could improve upon. NOTE- Pick something from the Critique Guide.
In the second part you will provide an assessment of your portfolio and your work ethic.
Overall Portfolio-Semester work
Please answer the following questions about your overall work this semester using the 1-4 scale:
1=Not at all, 2=Somewhat, 3=Mostly, 4=Absolutely
I completed my assignments on time 1 2 3 4
I fulfilled all assignments 1 2 3 4
Made good use of class time 1 2 3 4
Used a creative approach 1 2 3 4
My pictures unique and original 1 2 3 4
My craftsmanship is excellent 1 2 3 4
My images are sharp and focused 1 2 3 4
My images are well composed 1 2 3 4
My images have good contrast and exposure 1 2 3 4
My photography sets a mood 1 2 3 4
Friday, December 6, 2019
Using Photoshop Filters
You can use filters to clean up or retouch your photos, apply special art effects that give your image the appearance of a sketch or impressionistic painting, or create unique transformations using distortions and lighting effects. The filters provided by Adobe appear in the Filter menu.
Assignment:
Experiment with a variety of Photoshop Filters. Post your pictures using 7 different filters. Add the name of the filter you used.


Assignment:
Experiment with a variety of Photoshop Filters. Post your pictures using 7 different filters. Add the name of the filter you used.
Monday, December 2, 2019
Write Critiques and catch-up day
Today you will write critiques for the Antique store photos.
Critique your best photo and also one of your classmates.
I will also be checking your work for the last few projects.
Critique your best photo and also one of your classmates.
I will also be checking your work for the last few projects.
- Hands on Review Photos
- Studio Portraits
- Still Life Photos
- Antique Store Photos
Monday, November 25, 2019
Write 2 Critiques of the Antique Store Photographs
Today you will write TWO thorough critiques using the Critique Guide.
Copy and Paste the questions from the Critique Guide and change your answers to a different text color.
1. the first will be a critique of one of your pictures from field trip. Include a copy of the picture with your critique.
2. The second will be a critique of one of your classmate's pictures from the field trip. Include the picture and the name of the classmate.
Here is a good example of a written critique:
http://jessicamphoto13afall16.blogspot.com/2016/09/personal-critique-of-ozark-square.html
Copy and Paste the questions from the Critique Guide and change your answers to a different text color.
1. the first will be a critique of one of your pictures from field trip. Include a copy of the picture with your critique.
2. The second will be a critique of one of your classmate's pictures from the field trip. Include the picture and the name of the classmate.
Here is a good example of a written critique:
http://jessicamphoto13afall16.blogspot.com/2016/09/personal-critique-of-ozark-square.html
Edit and Post Your Antique Store Photographs
Edit and Post the Antique Store from the field trip.
Crop, De-saturate and adjust Levels to get the best possible image.
All photos must be in Black and White. You may upload color pictures, but there must also be a Black and White version.
Your uploaded pictures should include :


Crop, De-saturate and adjust Levels to get the best possible image.
All photos must be in Black and White. You may upload color pictures, but there must also be a Black and White version.
Your uploaded pictures should include :
- 3 Still Life including at least 1 with a definite Focal Point and at least 1 that includes Repetition of the Elements
- 3 Details - either Close ups or Textures
- 3-5 additional pictures of your choice from the field trip
Tuesday, November 19, 2019
Football Field Photos - Depth of Field Practice
Upload at least 4 of the photos you took today.
The Fence and Shadows
2 of your choice
Label each picture Deep or Shallow and include the exposure settings for ISO, Shutter Speed and Aperture
The Fence and Shadows
- 1 Shallow D.o.F
- 1 Deep D.o.F
2 of your choice
- 1 Shallow D.o.F
- 1 Deep D.o.F
Label each picture Deep or Shallow and include the exposure settings for ISO, Shutter Speed and Aperture
Wednesday, November 13, 2019
Hands-On Review Day
Today we will go out and practice Aperture and Depth of Field.
Upload the following pictures and include the ISO, Shutter Speed and Aperture settings:
Photo 1
Photo 2
Photo 3
Photo 4
Upload the following pictures and include the ISO, Shutter Speed and Aperture settings:
Photo 1
- Take a picture with a definite Focal Point
- Shallow Depth of Field
Photo 2
- Take a picture using the Rule of Thirds
- Deep Depth of Field
Photo 3
- Take a picture of something close up with Bugs Eye View
- Shallow Depth of Field
Photo 4
- Take a picture with leading Lines
- Deep Depth of Field
Wednesday, November 6, 2019
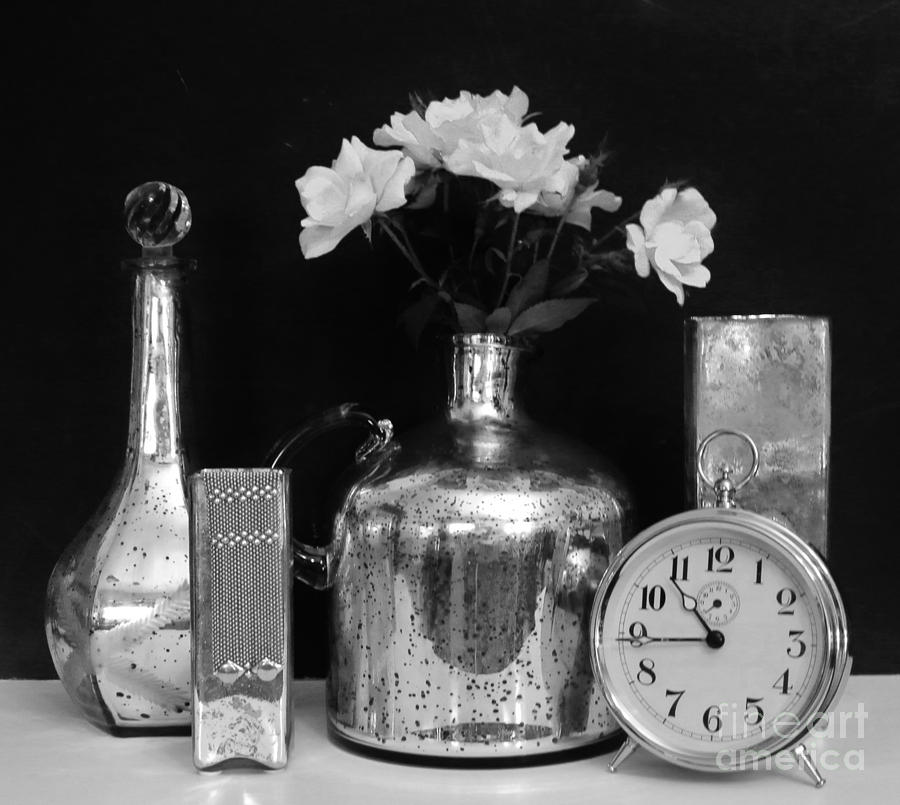
Still Life Photography
Today we will set up and photograph a Still Life photograph using various objects and lighting.
Use s Shutter Speed of 1/60 or greater
Use a wide Aperture for Shallow Depth of Field
Use the lowest ISO that will work
In a Still Life photograph you have complete control over the composition, lighting, and exposure settings of the picture.
It does not have to be composed of a lot of things. A single object that is dramatically lighted is sometimes the best way to go.
You need to take the foreground and background into consideration as well. Choose a dark backdrop or textures in your picture as well.
You can focus on close ups and details....

or use Shallow Depth of Field

or capture the entire object with dramatic shadows....

or set up an interesting composition...


Use shadows and repetition

or use even lighting
Use s Shutter Speed of 1/60 or greater
Use a wide Aperture for Shallow Depth of Field
Use the lowest ISO that will work
In a Still Life photograph you have complete control over the composition, lighting, and exposure settings of the picture.
It does not have to be composed of a lot of things. A single object that is dramatically lighted is sometimes the best way to go.
You need to take the foreground and background into consideration as well. Choose a dark backdrop or textures in your picture as well.
You can focus on close ups and details....
or use Shallow Depth of Field
or capture the entire object with dramatic shadows....
or set up an interesting composition...
Use shadows and repetition
or use even lighting
Friday, November 1, 2019
Studio Portraits Due Today
Edit and upload your portraits today.
Upload at least 5 Black and White portraits.
Black and White is required but you can include color as well.
Upload at least 5 Black and White portraits.
Black and White is required but you can include color as well.
Wednesday, October 30, 2019
Cropping Photographs
It is important to compose your photograph through the viewfinder when you shoot, but there may be instances when you will want to Crop a picture you take. to Crop means to cut or trim out the areas of a picture you do not want. it is used to help create a definite focal point, or point of interest, and can also be used to adjust your picture so that it complies with the Rule of Thirds.
Tools used:
Crop Tool
Ratio
View menu
Ratio
View menu
I will give a demonstration of these tools in class, and you can find a detailed tutorial at the site below:
Your task today is to select 1 photo you have taken and crop them according to the Rule of Thirds.
You may choose the Ratio, but state which Ratio you have chosen in the blog post.
Include the original version of the Photograph.
Here is an example below.
Cropping Assignment
Original Uncropped

Cropped . Original Ratio, Rule of Thirds

You may choose the Ratio, but state which Ratio you have chosen in the blog post.
Include the original version of the Photograph.
Here is an example below.
Cropping Assignment
Original Uncropped

Cropped . Original Ratio, Rule of Thirds

Studio Lighting Portraits
Today we will go to the stage and set up studio lighting for portraits.
Use a large Aperture for Shallow Depth of Field.
Use a Shutter Speed of at least 1/60 to avoid motion blur.
You should use the lowest ISO possible.
The goal for this project is to capture both shadows and highlights in your portraits.
Extra credit will be given for modeling for the class.
We will download the photos today.
We will edit the Pictures Friday.


Use a large Aperture for Shallow Depth of Field.
Use a Shutter Speed of at least 1/60 to avoid motion blur.
You should use the lowest ISO possible.
The goal for this project is to capture both shadows and highlights in your portraits.
Extra credit will be given for modeling for the class.
We will download the photos today.
We will edit the Pictures Friday.
Monday, October 28, 2019
Complete Written Critiques
Finish the critique of your photograph if you have not done so.
Next, look at your classmate's work. Find one photograph that you like. In a new blog post include the picture and use the critique guide to briefly explain what makes the photo stand out.
We will begin in-class critiques in 20 minutes.
Next, look at your classmate's work. Find one photograph that you like. In a new blog post include the picture and use the critique guide to briefly explain what makes the photo stand out.
We will begin in-class critiques in 20 minutes.
Thursday, October 24, 2019
Write 2 Critiques of the Hardware Store Pictures
Today you will write TWO thorough critiques using the Critique Guide.
1. the first will be a critique of one of your pictures from the field trip.
Include a copy of the picture with your critique.
2. The second will be a critique of one of your classmates pictures from the field trip. Include the picture.
Here is a good example of a written critique:
http://jessicamphoto13afall16.blogspot.com/2016/09/personal-critique-of-ozark-square.html
1. the first will be a critique of one of your pictures from the field trip.
Include a copy of the picture with your critique.
2. The second will be a critique of one of your classmates pictures from the field trip. Include the picture.
Here is a good example of a written critique:
http://jessicamphoto13afall16.blogspot.com/2016/09/personal-critique-of-ozark-square.html
Tuesday, October 22, 2019
Edit and Post the Ozark Square Pictures
Download, Edit, and Post the Ozark Square Pictures from the field trip.
De-saturate and Adjust Levels to get the best possible image.
Your pictures should include:
4 City Scenes
4 Architectural Details - either Close ups or Textures
2-5 other Photos of your choice
10-15 photos total
If you have good shots of any of the following then you should post them also
Shadows
reflections
People - Environmental portraits
Animals
Plants or Nature


De-saturate and Adjust Levels to get the best possible image.
Your pictures should include:
4 City Scenes
4 Architectural Details - either Close ups or Textures
2-5 other Photos of your choice
10-15 photos total
If you have good shots of any of the following then you should post them also
Shadows
reflections
People - Environmental portraits
Animals
Plants or Nature
Tuesday, October 15, 2019
Add and Remove Things From a Picture You have Taken
Using the Clone/Stamp Tool, REMOVE at least 1 thing and ADD another. Use a picture that you have taken.
...look at the examples below
Original Photo


...look at the examples below
Original Photo

Retouched Photo

Retouching Using the Clone-Stamp Tool
Today we will work with a couple of tools to help improve minor imperfections in our photos.
Download the 2 photos below, retouch them, and upload the before and after pictures to your blog.


Download the 2 photos below, retouch them, and upload the before and after pictures to your blog.


Friday, October 11, 2019
Using the Dodge and Burn Tool in Photoshop
Today we will discuss the Burning and Dodging tools in Photoshop.
The Burn Tool will darken an area, the Dodge Tool lightens an area.
I will give a demonstration of this in class.
After I show you how to use the tools you will post an example of your use of the tools. The instructions and examples are below:
Post a before and after picture demonstrating your use of the Burn and dodge tools in Photoshop.
The burn tool will darken areas of your image, and the Dodge tool will lighten areas of your image.
In a brief paragraph explain the areas that you burned and dodged.
Follow the example below:
Original Photograph

Dodged and Burned Photograph

I dodged the highlights on the bananas and in the blurry chair in the background. I felt like the picture would be stronger if you could better see the details in the distance.
I burned the details in the glass bowl as well as in the bananas because I felt that the bowl was too grayish and i wanted more contrast. Finally I burned the wall on the right of the bowl because it was hard to see where the bowl ended and the wall began.
The Burn Tool will darken an area, the Dodge Tool lightens an area.
I will give a demonstration of this in class.
After I show you how to use the tools you will post an example of your use of the tools. The instructions and examples are below:
Post a before and after picture demonstrating your use of the Burn and dodge tools in Photoshop.
The burn tool will darken areas of your image, and the Dodge tool will lighten areas of your image.
In a brief paragraph explain the areas that you burned and dodged.
Follow the example below:
Original Photograph

Dodged and Burned Photograph

I dodged the highlights on the bananas and in the blurry chair in the background. I felt like the picture would be stronger if you could better see the details in the distance.
I burned the details in the glass bowl as well as in the bananas because I felt that the bowl was too grayish and i wanted more contrast. Finally I burned the wall on the right of the bowl because it was hard to see where the bowl ended and the wall began.
Wednesday, October 9, 2019
Adjustment Layers - Levels
Most pictures will require an adjustment of Contrast, or the range of value in a picture.
The picture below is overall very flat. It is a low-image with no pure whites and no black and few dark grey values.

Today we will be using Adjustment Layers to change the Levels of Dark, Middle, and Light Values in a photograph.
We will use the Histogram in Photoshop to analyze the amount of Dark, Middle, and Light tones in a picture.
A Histogram is a graph that shows the Levels of Value in a picture.
We will upload 3 examples of the use of the Levels Adjustment Layer.
Include the picture and the Histogram.
here is an example ...


The picture below is overall very flat. It is a low-image with no pure whites and no black and few dark grey values.

Today we will be using Adjustment Layers to change the Levels of Dark, Middle, and Light Values in a photograph.
We will use the Histogram in Photoshop to analyze the amount of Dark, Middle, and Light tones in a picture.
A Histogram is a graph that shows the Levels of Value in a picture.
We will upload 3 examples of the use of the Levels Adjustment Layer.
Include the picture and the Histogram.
here is an example ...


Monday, October 7, 2019
Change a Photo to Black and White Using Hue-Saturation Adjustment Layer
Change a color photo to black and white
Open a photograph you have taken
Using the Hue-Saturation Adjustment layer, convert the picture to black and white.
Post the original and De-Saturated (black and White) to your blog.


Open a photograph you have taken
Using the Hue-Saturation Adjustment layer, convert the picture to black and white.
Post the original and De-Saturated (black and White) to your blog.


Subscribe to:
Posts (Atom)
-
Edit and upload your portraits today. Upload at least 5 Black and White portraits. Black and White is required but you can include color ...
-
 You can use filters to clean up or retouch your photos, apply special art effects that give your image the appearance of a sketch or impress...
-
Today we will set up and photograph a Still Life photograph using various objects and lighting. Use s Shutter Speed of 1/60 or greater Use...


